
A rain garden is an easy, low cost way to infiltrate your stormwater and bring some more beauty into your landscape. Learn the basics below, and download some helpful resources at the bottom of this page.
You can also find rain garden designs in our Sample Designs page, and some helpful tips in the Lessons Learned page.
We also offer free workshops on how to build a rain garden every spring and fall!
1 – Pick a Location
Find a spot in your yard where you can easily direct the runoff from your downspout or other impervious surface. Do a percolation test to ensure that the soils in that spot can soak up rain water. To avoid drainage problems, place your rain garden at least ten feet from your house if you have a basement (two feet if you don’t), five feet from your property line, and three feet from driveways, sidewalks, and patios. Call your local jurisdiction to find out if you need a permit to disconnect your downspout or if there are special requirements.
How to Do a Percolation Test
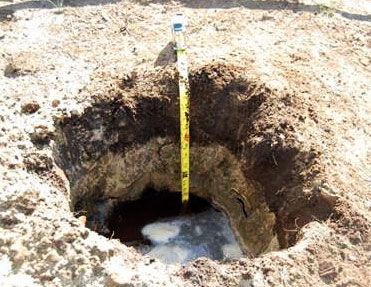
- Dig a hole at least twelve inches deep.
- Fill it with water and let it drain.
- Fill it with water a second time. If the water drains at least half an inch in an hour the second time you fill it, your soil has adequate drainage for a rain garden.
2 – Calculate how big your rain garden needs to be
A good guideline is that your rain garden needs to be at least 10%-15% of the area it is receiving water from. So if the downspout you are routing to the garden drains 500 square feet of roof area, the dimensions of your rain garden should total at least 50 square feet. It’s always ok to go bigger, especially if your soil drains slowly (1″ per hour or less).
One way to measure your roof area is by using Google Maps aerial photography:
3 – Dig the Basin
Dig a shallow depression to create a rain garden area about six inches deep. You can make it as long and wide as you like – the bigger it is, the more rain water it can soak up.
 Don’t forget to call before you dig so you don’t hit any buried utility lines! In Oregon call 1-800-332-2344, or 811.
4 – Create a Berm
Use the soil you dig up to create a berm (and pack the soil well!) on the down slope side and direct the overflow safely away from nearby buildings. Make the bottom of your rain garden level. If you like, you can amend the soil in your rain garden with compost.
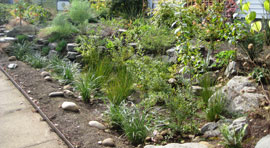
5 – Get Planting!

Help us track of the number of rain gardens out there and receive a free rain garden sign by registering your rain garden!
Plant your plants and then mulch. Water the plants until they are established. Here are two sample designs, each based on the amount of sun the area receives:
Stay tuned for more designs in the sample designs page.
Rain Garden Resources
- Download the Oregon Rain Garden Guide – a comprehensive guide to building rain gardens in Oregon
- Watch an installation video from BES (13 minutes)
- Download a full-color Rain Garden Brochure
- Maintaining Rain Gardens, Swales and Stormwater Planters
from the Program Resources section